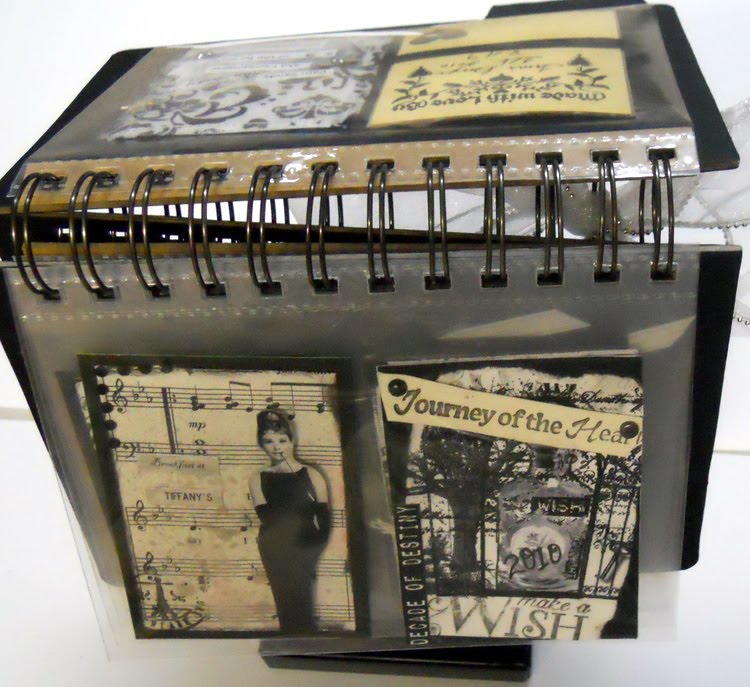
Sunday, September 26, 2010

Less than a week to go, the countdown has started, WOOOOOO! :)

Oh my word, in less than a week we will be attending a wedding.  Hopefully the weather will be beautiful, since the ceremony will be outdoors.  {fingers crossed}  The reception is indoors, so if the weather doesn't cooperate, at least we will be warm and dry inside for the dinner and party.  I have been working like crazy on more items, and have a boatload to show you today.  Remember that candle holder I bought half off at Hobby Lobby?  Well, here is what it looks like now (ignore the background, I will post better pics after setting up at the hall)~

Here is the back ~


No candles ~


Here is what it looked like before I sparkled it up (gotta love those sparkly sprays!) and made it bigger ~


Next, remember these baskets I bought for 25 cents each during the huge US 12 garage sale?


Here they are now, repainted, antiqued, embellished, and all ready for the flower girls to carry ~


I was at Hobby Lobby again (surprise!) and found this lovely candle holder (on sale for 1/2 off of course)~


I thought it would be lovely on the cake table.  Just one more thing needed to make it perfect ~


A rub on.  Easy peasy!  I love this saying (and the song, one of my all time favs), I thought it was perfect for two people beginning their life together.  Anyway, the rub on is by Upsy Daisy Designs.

Next, I purchased 2 three packs of some beautiful name card holders (each package included beautiful fall colors of forest green, deep red, and burnt orange holders~ again, half off at Hobby Lobby WOOOO HOOO).  There will be 6 reserved tables at the wedding, the rest are open to whomever wishes to sit there.  My daughter wanted people to have the freedom to select where they sit.  Anyway, I made some Reserved cards to put in the holders.  Here is a peek at one of the holders  ~


I wish you could see how sparkly and gorgeous these are irl.  I used some copper foil from a manufacturer that I found at CHA.  (I will be offering classes using this beautiful product, watch for details.)

I also made one that is folded and ready to sit on a table, just in case we need one more (I couldn't find any more holders at Hobby Lobby, they sold out in 2 days, DANG it!).  Here it is (a lovely shade of chocolate brown bazzill is the cs by the way) ~


Next, I picked up some kraft colored gift bags to fill with a few goodies for our guests that will be staying overnight in a hotel (price of bags, 2 for $1.00).  I added a wee bit to them, stamped saying, ribbon, and cs ~


We will tie an organza ribbon around the handles after we fill them.  Simple, yet pretty. Of course I also had to add a wee bit of bling, as you probably noticed.  ;)

I finally finished the flower ball that will hang over the dance floor (in the middle of some draped tulle and lights).  I was lucky enough to have a friend come over and help with things one day last week, she cut and wired all the little sparkly net bits I tucked in here and there.  You can't really see them very well, but they are there, and look sparkly lovely.  :)   This flower ball is one of my daughter's favorite things so far.  She reaaaaaaaaaaalllly wanted one, so I am happy that she likes how it turned out.  Here are a few pics (view from the side top)~


view from the other side ~


view of Bruce, one of our Shizons, in front of the side view of the flower ball (he is very nosy, can you tell?) ~


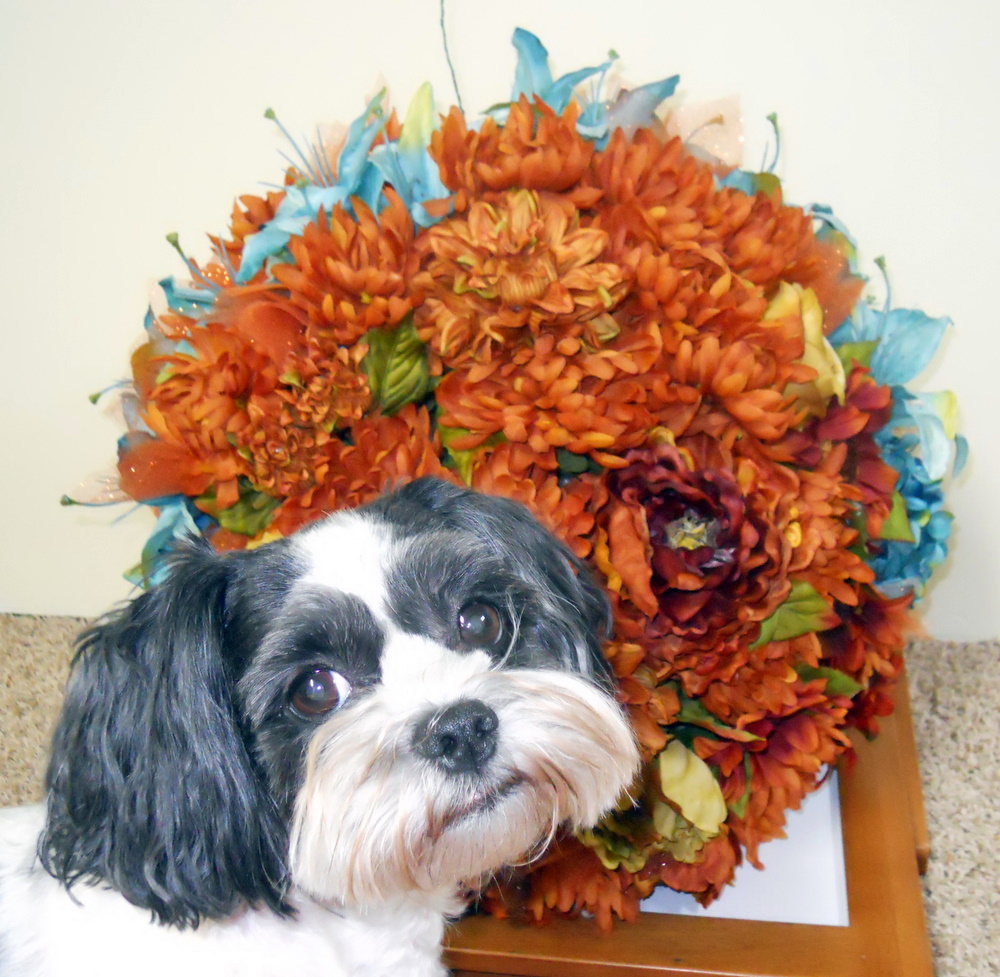
view of the side bottom of the flower ball ~


I also finished one of the flower girl dresses, and the headpiece.  I have one more flower girl dress to finish, finish hemming my daughter's dress, and altering my dress.  Then just the little bits and pieces of assorted projects, and last minute things before  packing everything up to haul out to the hall.  Whew! 

Thanks so much for reading my long post today, I hope some of these ideas are things you can incorporate into your creations.  I would love to see pics if so.  My next post will be after the wedding, so there will probably be a lot more pics to share.  :)   Take care til then, and happy crafting!  ~ Pam


Sunday, September 19, 2010

Time for a winner! Please take a peek at the wedding book too.

Alrighty then!  Time to post the winner of my last blog candy.  Without further ado, it is Lagene!  Please email me your postal addie, and I will zip your prize out to you as soon as I can get to the post office.  I also have a wee little something else for fairyrocks (Pam) since I drew a second name, you know I can never do just one give-away.  Last but not least, since the blog is at 100 followers now, I decided to send a wee little something to Cathy, who is the 100th follower. Thank you so much to all of you who left me some love, and who took time to go peek at my guest artist post at Scrapbook News and Review.  I greatly appreciate it!!!  Ladies, please send me your addies when you get time.

OK, on to wedding stuff now!  I have to tell you, I have been working like a wild woman.  I have lots and lots of things half way done or in process, so I don't have a lot of wedding project pics to share this week, but I promise they are on the way.  I did finish the brown copper metallic organza table runners, all 25 of them (thank you to my super duper pal Judy, who ironed for HOURS to help out), and I have a pile of the aqua tealish table toppers done too.  I am so lucky, two friends at Sew B helped me stitch on this super slippery material - Sharon and Cindy.   Cindy even took the rest of my stack home (over half the pile YAY) to finish stitching them up for me.  I am SO DANG LUCKY to have such helpful friends (including Suzanne and Rae, who helped put the table decor things together a few weeks ago).  A great big ole THANK YOU  to all of you!!! 

I did finish up the wedding wishes book though, here is a little peek ~


Do you like it?  I like how it turned out, hopefully Cort will too.  I don't know if you can tell, but the foam letter stickers are super glittery, soooooo pretty!

I am working on Kaya's flower girl dress now, it is all cut out and I will start stitching it up soon.  Then I will cut out Katie's dress and work on hers.  That will be more of a challenge, since she lives in Chicago (a few hours away), and I need to enlarge the pattern several sizes.  I won't see her until the rehearsal dinner, so keep your fingers crossed for me.  :) 
I worked on just a wee bit more garden stuff the past few weeks too.  Here are some of the fun fun rainbow carrots we planted ~


I love the maroon carrots!  Something fun about them, they are orange and yellow inside.  Here are a few in the sink, besides the two I cut the tops and ends off, you can see I scrubbed another odd shaped one a wee bit too hard, I took off some of the lovely maroon color ~


Here are some lovely rainbow carrots all diced up and ready for soup ~


They are definitely a fun crop to grow, and easy peasy too.  I hope to grow them again next year.

Well, that is it for today, I promise to share lots of wedding project pics next weekend.  It definitely looks like a special fall event is about to take place when you look around my house.  WOOO, exciting! ;)  Less than two weeks now, oh my!

Wishing you an awesome happy and creative week.  Happy crafting!  ~ Pam

Sunday, September 12, 2010

Thank you for viewing my Guest Artist Tutorial, and a wee bit more wedding stuff :)

Hellllllooooooooooooooooo!!!  How are you all doing today?  Fab?  Super fab?  I sure hope so!  It has been crazy busy here with all the wedding prep.  Time is zipping by super quickly, and I still have a lot to accomplish.  First I wanted to say thank you to all of you who took the time to go read my Guest Artist Post at Scrapbook News and Review.  I appreciate it!  I will be drawing a winner for the blog candy later this week (Saturday September 18), and I will post who it is on Sunday the 19th. Here it is again in case you want to enter the drawing -

Remember, all you have to do is go check out my Guest Artist Post at Scrapbook News and Review, then come back here and post what your favorite project was, and sign up to be  a follower of my blog.  If you are already a follower, you are halfway entered!  :) 

Next, I have a quick little tutorial on adding a wee bit more to a project.  Remember these wedding items I posted about a few weeks ago?
The champagne glasses in particular?
Well, I wanted to make the bride and groom glasses a wee bit more unique, so I had my daughter pick out her two favorites.  Once she had selected them, I added a bit to them.  First, I found these awesome brass filigree charms half off at Hobby Lobby (reg price $2.99 for a package of 4, sale price $1.50 for a package of 4).  I took two, turned them on a diagonal so they were diamond shaped, and slightly bent them in a rounded shape so they fit the glasses.  It was super easy, I gently used my hands to shpe them, then curved them a bit more by using the edge of a table.  You can see my supplies here ~
After I had the brass medallions curved, I laid the glasses down and glued the brass embellie to them (make sur eyou use a good strong glue, Helmar makes FABULOUS glues)~
I found the cute little Bride and Groom charms in a wedding area of Hobby Lobby, they were only $2.99 regular price, but on sale for half off ($1.50).  They were strung on a little tiny circle of wire designed to go around the base of a wine or champagne glass. I wanted them to be a bit more of a focal piece, so I glued them on top of the medallion (centered) ~
Since there was a little hole where they were hung, I decided to use some sparkly little crystals to cover the hole.  I tried orange, didn't like it, then brown, still didn't like it, and then tried goldish brown.  Loved it!

Here they are, all jazzed up and ready to use ~


One final pic I want to show you.  Here are some glass vases I got at that huge US 12 garage sale ~
They were soooooooooooo inexpensive, YAY!  Better yet, I got them for half off the sticker price, since I bought them at one of the last places we stopped at.  It was the final day, and it was looking like rain soon, so everything was half off.  WOOOO HOOO!!!  Wait till you see what I am going to do with them.  :)  I'll share that next week, along with several other wedding projects.  Till then, don't forget to check out my Guest Artist Post, hope you have a fantastic week, and happy crafting!  ~ Pam

Sunday, September 5, 2010

Lots of wedding project pics, Bind-It-All Priojects, Mini albums, ATCs, and my Guest Artist info!

Happy Labor Day Weekend to all my US friends!  Hope you are enjoying beautiful weather and relaxing.  I have been working on more wedding projects, I have some mini album pics to share, and I want to link you up to my guest artist post.  First, I am so excited and honored to be a guest artist on Scrapbook News And Review, an awesome ezine featuring not only scrappy stuff, but all sorts of creative paper crafting goodness.  There are some peeps with mad skills over there, and they are AMAZINGLY generous with their time and talent.  Lots of fabulous tutorials on mixed media art, as well as things like ATCs, inchies, cards, and more.  Please check out my tutorial beginning Monday September 6.  I have a chance for you to win a little blog candy if you do.  :)  More about that in a minute.  First, I am going to start off with some minis and projects I did for September using my Bind-It-All (make sure you go check out the Bind-It-All blog, besides fab tutorials and pics, OZZ DT Jennifer Priest is doing a fun give-a-way!!! WOO HOO!!!).  I posted a wee sneak peek of a mini I made last week.  Here is a full pic ~

Here are a few pics of the inside (I used the super page protectors and Bamboo Spine Cover-All by Zutter, you can't believe how easy it is to work with these products, and how fantastic they look when you are done, the pics really do not do them justice at ALL)~


In the back of the book I added several blank pages.  This was the area for everyone to write their well wishes to the happy couple.  Later they will send an email with one of their fav recipes to share with the newlyweds ~
My next project was an ATC holder.  I used the fun Display-It-All and more of the faboo Page Protectors, now I can see both sides of each ATC, or change them out quickly and easily if I wish)~
View of the back ~
Views inside ~
Last in my September projects is a little Fall Wallhanging, using the oh-so-fab canvas artboard ~
I have enjoyed tinkering with the silk flowers, and decided to incorporate one of the little fall picks into a wall hanging.
Now for some wedding project pics.  Remember this pic? ~

Well, I finally had a chance to finish up those tabletop arrangements (30 in all).  Here are a few pics (please ignore my oh-so-stained work table)~
Of course the arrangements will look so much nicer on the table topper and tablerunner.  Remeber this pic? ~

I have been working on the flower girl baskets too, I will share a little tutorial next week on how they went from this  ~
to something a lot prettier.  :)  I will also share what I added to this to make it a bit more wedding sparkle-ish~
OK, thanks for reading this far!  I told you there would be blog candy, so here are the deets.  Please go to Scrapbook News and Reviews between September 6 - 12, and read my guest artist post.  I have a tutorial showing you how I created a beautiful card with a twist.  I also posted pics of other projects I have made, featuring some of my favorite things - fabric, texture, and sparkle. Here is a sneak peek example of one of the things I posted about, some ATCs I made for a swap at Red Lead (they have the COOLEST vintage stuff ever, including stamps, collage sheets, and trinkets!) ~
Please leave a comment here with your favorite item listed in my Guest Artist Tutorial, and sign up to be a follower of my blog.  Already a follower?  Super!  If so, just leave a comment on this post with your fav item in my Guest Artist Post at Scrapbook News and Reviews.  You will be entered in a drawing for some fun blog candy (2 bookmarks, an ATC, some bling, 3 mini fall stamps and a mini acrylic block) ~

Alrighty then?  Easy peasy! 
Thank you for hanging out at my blog today.  I can't wait to see what your fav project is that I have posted in my Guest Artist Post at Scrapbook News and Reviews!
Have an awesome week, and happy creating ~ Pam

How did I come up with Pam's Eclectic Stuff?

Pam- that is me. :)

eclectic --adj.- selecting what seems best of various styles or ideas
*Since I like a huge variety of arts and mediums, this seemed perfect, we will talk about the best of various styles or ideas.

stuff- The noun stuff has 7 senses -
1. material, stuff -- (the tangible substance that goes into the makeup of a physical object; "wheat is the stuff they use to make bread")2. whatchamacallit, stuff, whatsis, sundry, sundries -- (miscellaneous unspecified artifacts; "the trunk was full of stuff")3. stuff, clobber -- (informal terms for personal possessions; "did you take all your clobber?")4. stuff, stuff and nonsense, hooey, poppycock -- (senseless talk; "don't give me that stuff")5. stuff -- (unspecified qualities required to do or be something; "the stuff of heros"; "you don't have the stuff to be a United States Marine")6. stuff -- (information in some unspecified form; "it was stuff I had heard before"; "there's good stuff in that book")7. stuff -- (a critically important or characteristic component; "suspense is the very stuff of narrative")

*What more needs to be said? I really thought about using Pam's Eclectic Sundries, but I thought that might be tough to remember. :) Stuff is easy and conveys a variety of meanings. I like the definition- miscellaneous unspecified artifacts. I also liked whatchamacallit, but that is a lot of typing. :)

So there you have it!